
Steps to reduce the risk of a rack collapse

Pallet Racking systems are wide ranging and the choices available has grown significantly over several years. There has, however, been one big difference with systems today against systems of the past – they are now designed specifically against individual requirements and rarely over engineered.
This results in smaller safety margins being provided, resulting in increased risk to operations that do not follow rack safety protocol.
Although pallet racking is deemed to be a simple structure predicting the structural behaviour of racking is complicated and complex. Isolated damage may appear insignificant to your ongoing operation, but ignoring it can have major implications to the structural integrity of your system.
This overview on Rack Safety provides a condensed snapshot on what operations should implement internally and ongoing maintenance recommendations to employ.
Firstly we need to understand the basic principles of where the structural stability for a pallet rack system comes from. One of the most important elements of any rack system is the connection of its components – upright and bracing for front to back stability and upright and beam for left to right stability. Both these connections are critical to the stability of the structure, so regular visual checks of these key points should be carried out by the operation. These checks should include damage to upright and / or bracing, beams engaged fully into upright slots and a beam locking clip / pin in place.
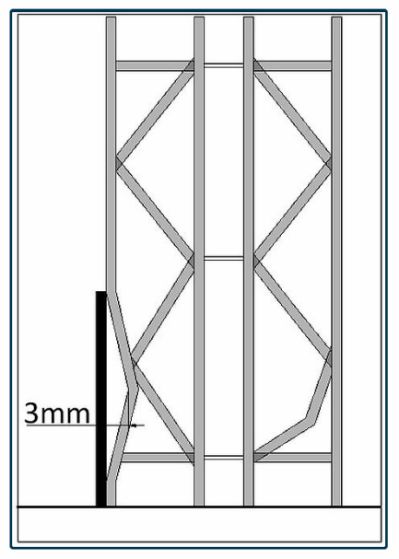
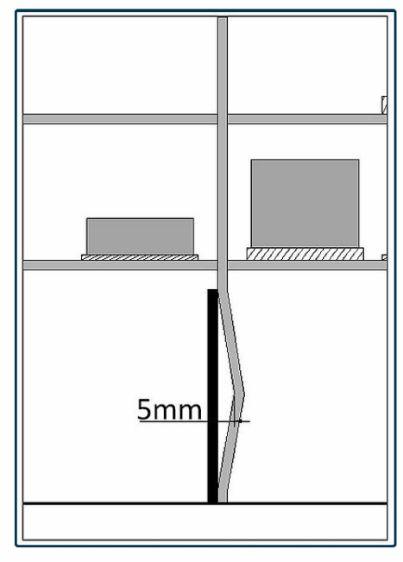
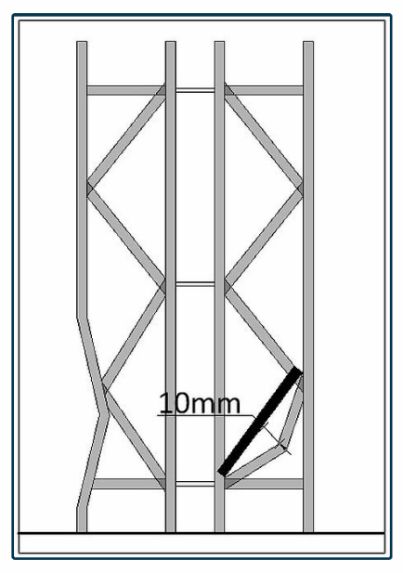
Upright damage changes the profile and the way it supports the load. As with any form of damage the operation should follow the guidelines set out by SEMA and allocate a code to the serverity of damage. The code SEMA recommends is a traffic light system, with green requiring ongoing monitoring, amber requiring replacement and locations not reloaded after goods removed, and red requiring immediate offload as location is structurally unsafe. Any damage listed as red should be isolated, with all storage locations supported by the upright unloaded and the bay taped off. These locations should not be used again until the damaged parts are replaced.
| Upright bent into the rack | Upright bent parallel to beam | Frame bracing | ||
| Risk | Green | Up to 3 mm | Up to 5 mm | Up to 10 mm |
| Amber | Between 3 & 6 mm | Between 5 & 10 mm | Between 10 & 20 mm | |
| Red | Over 6 mm | Over 10 mm | Over 20 mm |
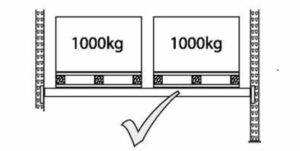
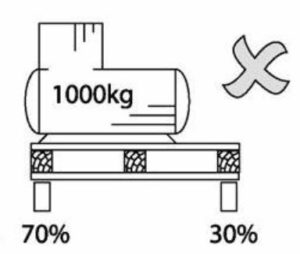
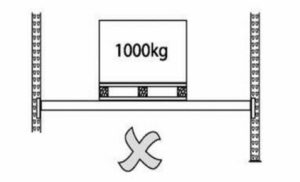
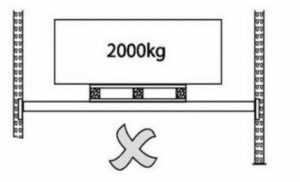
Racks are generally designed for a specific load based on size, weight and density. Be sure your rack has been designed around these parameters, as improper design can cause collapse.
The illustration shows how most racks are designed and structural calculations / load criteria is predominantly based on this design. For designs outside of this standard you should seek advice to ensure the rack has been designed with these parameters in mind. This includes storage of liquids which can impose differing loads due to the liquid movement within the storage medium.
Racks should never be altered without approval from a designer and new load boards provided to reflect these changes.
Rackit Direct Ltd is well placed to provide ongoing advice and maintained support to your Rack Safety requirements. Get in touch with us if you’d like to discuss the above in more detail. We’d be happy to visit your site and start discussing the best options for you.